We are excited to be presenting our Hands-on-Hacking Fundamentals (HHF) course at this year’s BlackHat USA 2021 conference.
In our HHF course we explore the fundamentals required to grow your hacking skills where you can utilise your newly learned skills with practical, real world hacks in our custom lab environment. This blog aims to demonstrate the fundamentals of networking and scanning using the defacto Network Mapper “Nmap” which is one of the many tools utilised in our course.
Our HHF course is designed for those who are right at the beginning of their journey into hacking, those in technical teams and those who receive our reports. Sometimes understanding the context and risk of a vulnerability can be difficult. In this course, we aim to demonstrate the risk and impact (or method and madness if you will) behind those vulnerabilities.
One of the modules you’ll be exposed to during the HHF course discusses the pros and cons to manual and automatic scanners. When using a manual scanner we can attempt to be stealthy or “ninja-like” in our approach.
TCP vs UDP
Before discussing scanning, we must first understand Transmission Control Protocol (TCP) and User Datagram Protocol (UDP). There are several differences, but the main one is that TCP is a Connection-oriented protocol, while UDP is datagram oriented. This means that TCP will establish a connection before transmitting data and should close the connection after transmitting the data, which guarantees the transmission of data; while UDP does not open a connection prior to transmission and therefore simply sends the data with no guarantee the data will be delivered to the destination. Because UDP has a much lighter weight and does not require the opening of a connection it is a much faster and simpler protocol. In this blog, we will be looking at scanning TCP, but UDP should never be forgotten!
Identifying live hosts
When we first land on a network we may want to identify how many hosts are alive on a network. The most common way to do this is by using Nmap to do an ICMP echo scan with the -sn flag.
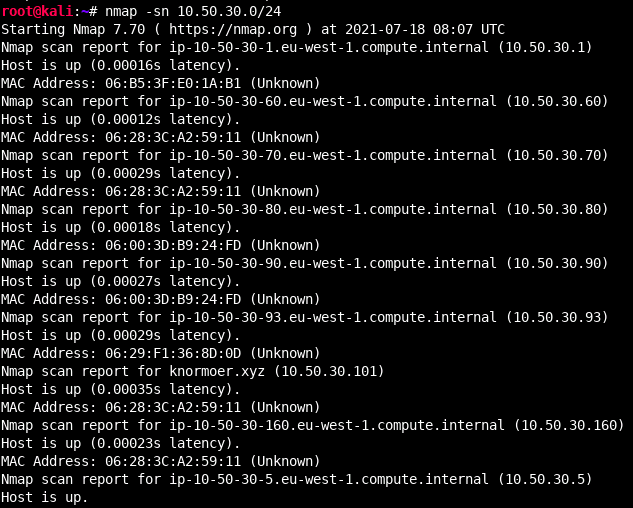
This helps us to reduce our scope from a full /24 (255 hosts) to a handful of hosts. By sending ICMP packets, we can assume a host is up if it responds with an echo reply. This is clearly useful, however if we are interested in being stealthy we may not want to send any packets on the network. Additionally, what would happen if ICMP was blocked? Well in this case we could consider doing a list scan. By using the -sL flag we could list the hosts in a provided network without sending any packets on the network. By itself that is not really useful, however, this scan type will by default do a reverse DNS lookup which can help us identify computers on the network (and often their use) just by their name.

TCP handshake
TCP uses a three-way handshake in order to open a connection between you and the service you would like to interact with.
The 3-way handshake works as follows:
- A client initiates communication by sending a SYN (Synchronized Sequence Number) to the server.
- A server responds to the client with an ACK (Acknowledgement) flag to signify the response of the SYN segment it received and its own SYN flag.
- The final step to opening the communication is for the client to acknowledge (ACK flag) the SYN segment it received from the server.
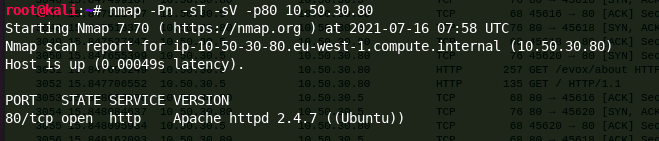
In order to perform a scan where we see the full effect of this we use the -sT flag which does a full TCP connect scan of a port.
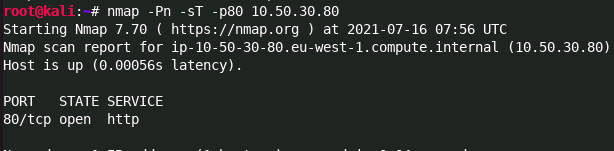

As we can see the TCP connect scan completed a full handshake on port 80 before resetting the connection with a RST flag to close the connection.
This scan type opens a full connection to a TCP port, which is far easier to be detected by network monitors, and not always what you want. Instead, we often prefer to use a TCP SYN scan, or a half open scan as its often referred to as (or “stealthy scan” if you want) with the -sS flag. In order to perform a half open scan, nmap needs to be running with root permissions. Coincidently, the TCP SYN scan type is also the default when nmap is running as root.
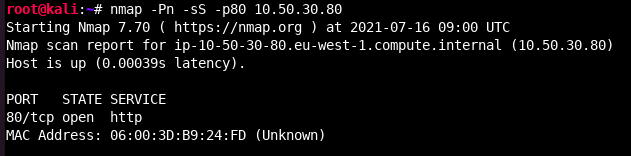

As we can see from the above wireshark output a SYN scan receives the SYN, ACK response from the server, which it interprets as the port is open. Next a RST is sent to close the connection. A closed port will differ in that it receives a RST flag from the server, indicating the port is available and not blocked by a firewall, but there is no service running on that port.
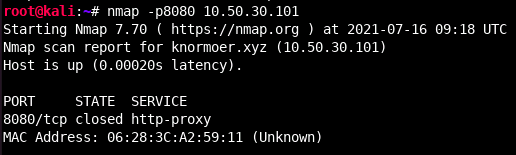

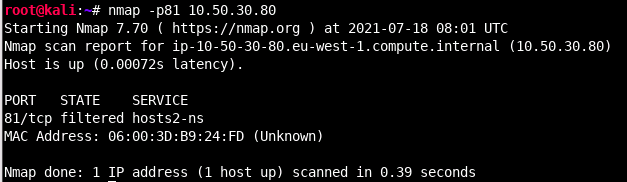
A filtered port indicates that a port is blocked by a firewall. Nmap identifies that a port is filtered when it receives no response after multiple attempts to communicate with that port.

Fingerprinting a service
Now that we have identified that a port is open, we may wish to see more information about the services listening on those ports – we can do this with the version detection (-sV) flag. This scan mode is much slower and creates a lot more traffic as it probes remote services, so be aware of that. Often it makes more sense to only use that against the ports that you already know are open. Due to the probing nature of this scan type, it is also highly likely to be seen by a blue team or other network monitoring software.
Nmap identifies a service version through a series of probe requests that interact with the remote service, matching responses to a local database of known signatures.
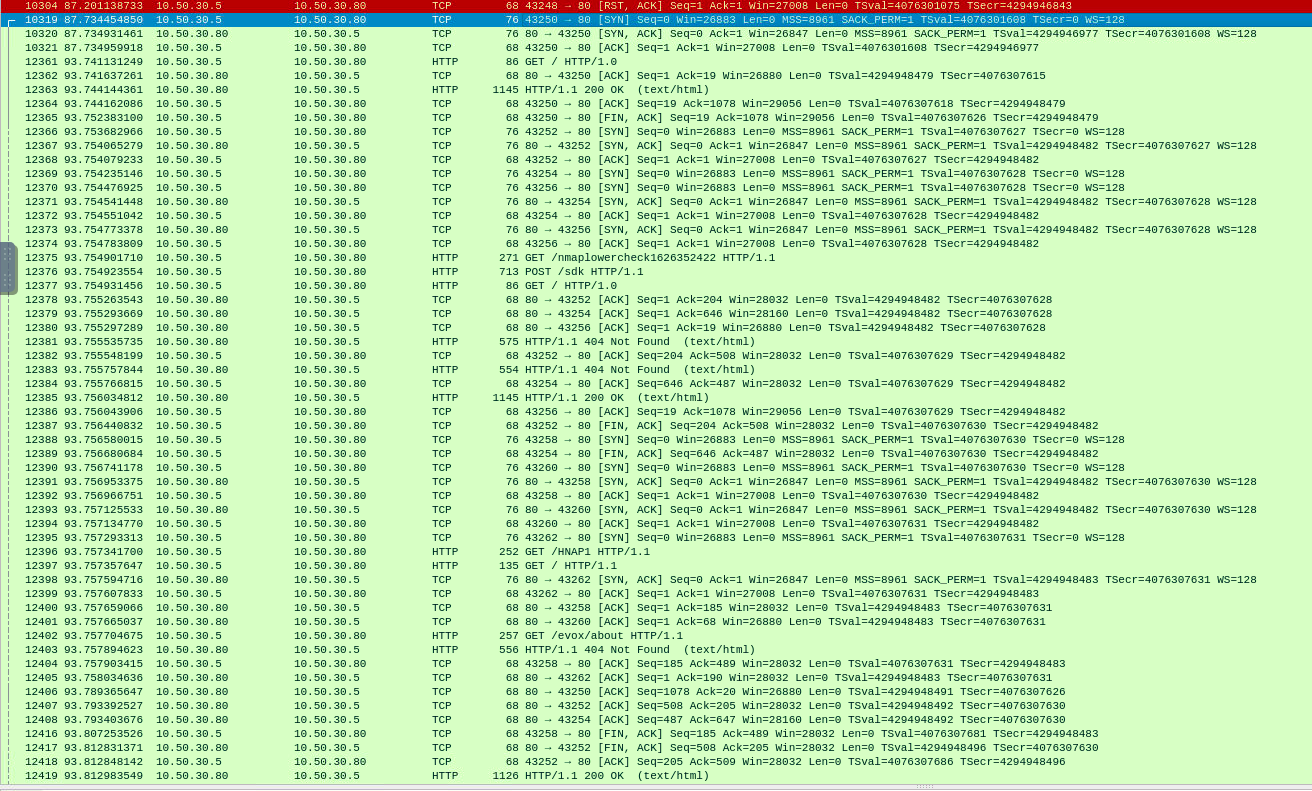
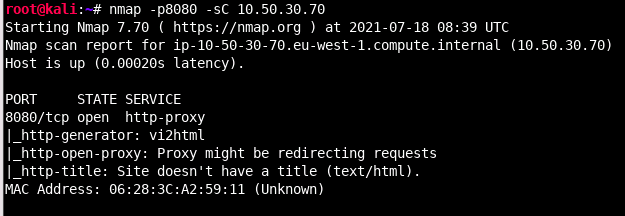
Often you might be interested in seeing whether a service is vulnerable to something, but you are unsure of what to check for. In this case you could leverage scripts that ship by default with nmap. Nmap scripts are tagged with categories, ranging from information gathering related scripts to script that do vulnerability scans. Scripts have a risk score tied to them as well. Obviously, the higher the risk score, the higher the chances of something bad happening (such as a service dying). Scripts with the default tag are generally safe to run, but may be intrusive in one or more ways, so make sure you have permission ;) Anyways, a default script scan (with the -sC flag) would run those scripts to help identify some potential or known vulnerabilities.


This can be super useful in providing helpful information on your quest to attacking a host, however, it will create a lot of traffic. In our above example, 302 packets were captured between the initial TCP handshake and final request, which is a lot.
In summary
As we can see, Nmap can be extremely helpful when attacking a network. We can utilise it both in situations where we need to be stealthier by not sending any packets on a network, to far less stealthier approaches where we try and identify as much information as we can about a host, akin to vulnerability scanning.
Join us
To learn more about the fundamentals of hacking and practise your hacking skills on real world labs, book now to join our course at BlackHat USA here:
- 31 July to 1 August: https://www.blackhat.com/us-21/training/schedule/index.html#hands-on-hacking-fundamentals-22019
- 2 August to 3 August: https://www.blackhat.com/us-21/training/schedule/index.html#hands-on-hacking-fundamentals-220191617744573
See you soon